


Setting up a generic NexusDB Data Module for C/S
This is almost identical to setting up the data module for embedded applications. Note that there is no need to include the TnxseAllEngines component as this is a client application - the engine registration needs to be performed on the server side only. For the examples we will set up a data module that uses TCP, the most common transport option, to connect to the server.
Hint
If you don't want to create this datamodule on your own you can find the complete source in the Examples\Delphi\Manual\Repository subdirectory of your NexusDB installation. If you don't have this directory you can download the examples from our webpage.
Step 1: Creating the data module
Create a new data module in Delphi by selecting File/New/Data Module from the Delphi main menu.
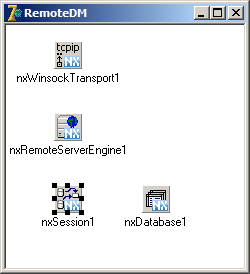
Locate a TnxWinsockTransport, TnxRemoteServerEngine, TnxSession and TnxDatabase component from the NexusDB tab on your component palette and drop them on the form. The data module should now look similar to this:
Step 2: Setting up the Transport
Select nxWinsockTransport1 and make sure that Mode is set to nxtmSend. Then set the ServerNameRuntime property to nexusdb@localhost if the server was started on the same machine and called NexusDB (or ServerName@ipaddresofserver (e.g. [email protected]) otherwise). If you want to see data at designtime set the ServerNameDesignTime to the same value.

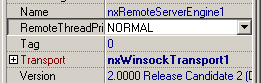
Step 3: Connecting the Remote Server Engine
Connect the remote server engine to the Transport component by simply double-clicking the Transport property or select from the drop-down list.
Step 4: Setting up the session
Connect the nxSession1 component to your NexusDB RemoteServerEngine1 component (pull down list of the Server Engine property). The properties of your session should now look as shown.

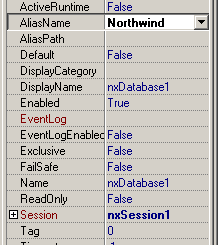
Step 5: Setting up the database
Connect the nxDatabase1 component to the Session component (from the pull down list). Finally, you will need to point the AliasName (not the AliasPath) property to where your data tables reside, if you followed the server setup steps earlier then this is the alias Northwind. The property Inspector for your database component should now look pretty much the same as the one shown.
Step 6: Adding the data module to the repository
As the last step we're adding the new data module to the Delphi repository so that we don't need to recreate it all the time. For this first save the data module, eg. by pressing CTRL-S. Save the datamodule to a directory which you want to use as a repository in the future.
Caveat
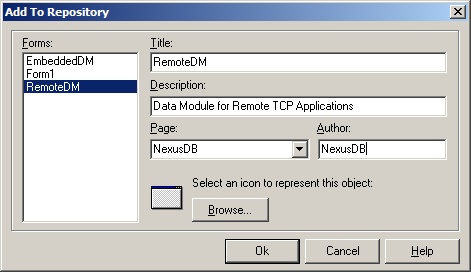
Make sure to not delete or move the files later, otherwise you won't be able to use it anymore. When done, find an empty spot on the data module and right-click. In the popup menu select Add to Repository.

This brings up the following dialog. Please fill out the fields like this and press OK.
You are now ready to go! It's that straightforward!
Questions? Problems?
- Interested to buy but something put you off?
- Can't find what you're looking for?
- Have a suggestion?
Let us know. If you're having trouble contacting us, please check here.


Site Updates
- May 27 2025 - 2:55pm
- May 14 2025 - 12:32pm
- Mar 19 2025 - 9:52pm
- Mar 14 2025 - 11:23am
- Mar 13 2025 - 11:42pm