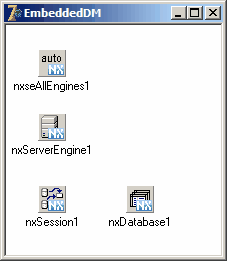
This section explains how to set up a generic simple data module that you can use to create database enabled applications. In the Delphi IDE you will need to create a new project. Now follow these steps to create the data module shown in the figure below (for Delphi 7):
Hint
If you don't want to create this datamodule on your own you can find the complete source in the Examples\Delphi\Manual\Repository subdirectory of your NexusDB installation. If you don't have this directory you download the examples from our webpage.
Step 1: Creating the data module
Create a new data module in Delphi by selecting File/New/Data Module from the Delphi main menu.
Locate a TnxseAllEngines, TnxServerEngine, TnxSession and TnxDatabase component from the NexusDB tab on your component palette and drop them on the form. The data module should now look similar to this:

Step 2: Setting up the session
Connect the nxSession1 component to your NexusDB ServerEngine1 component (pull down list of the Server Engine property). The properties of your session should now look as shown.

Step 3: Setting up the database
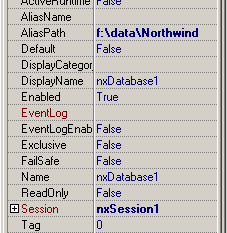
Connect the nxDatabase1 component to the Session component (from the pull down list). Finally, you will need to point the AliasPath (not the AliasName) property to where your data tables reside, in this case, I've got mine sitting in f:\data\Northwind. The Property Inspector for your database component should now look pretty much the same as the one shown.

Step 4: Adding the data module to the repository
As the last step we're adding the new data module to the Delphi repository so that we don't need to recreate it all the time. For this first save the data module, eg. by pressing CTRL-S. Save the datamodule to a directory which you want to use as a repository in the future.
Caveat
Make sure to not delete or move the files later, otherwise you won't be able to use it anymore. When done, find an empty spot on the data module and right-click. In the popup menu select Add to Repository.

This brings up the following dialog. Please fill out the fields like this and press OK.

You are now ready to go! It's that straightforward!


